Nokia 5110 LCD Display with Arduino ElectroSoftCloud
The Nokia 5110 LCD library can be used to drive the inexpensive and low power displays that used to be found on old Nokia phones and are not readily available online. This library does not use a framebuffer therefore can be run on chips with low memory such as the ATTiny family. Author: Dimitris Platis Maintainer: Dimitris Platis
Menu on Nokia 5110 LCD display with Arduino
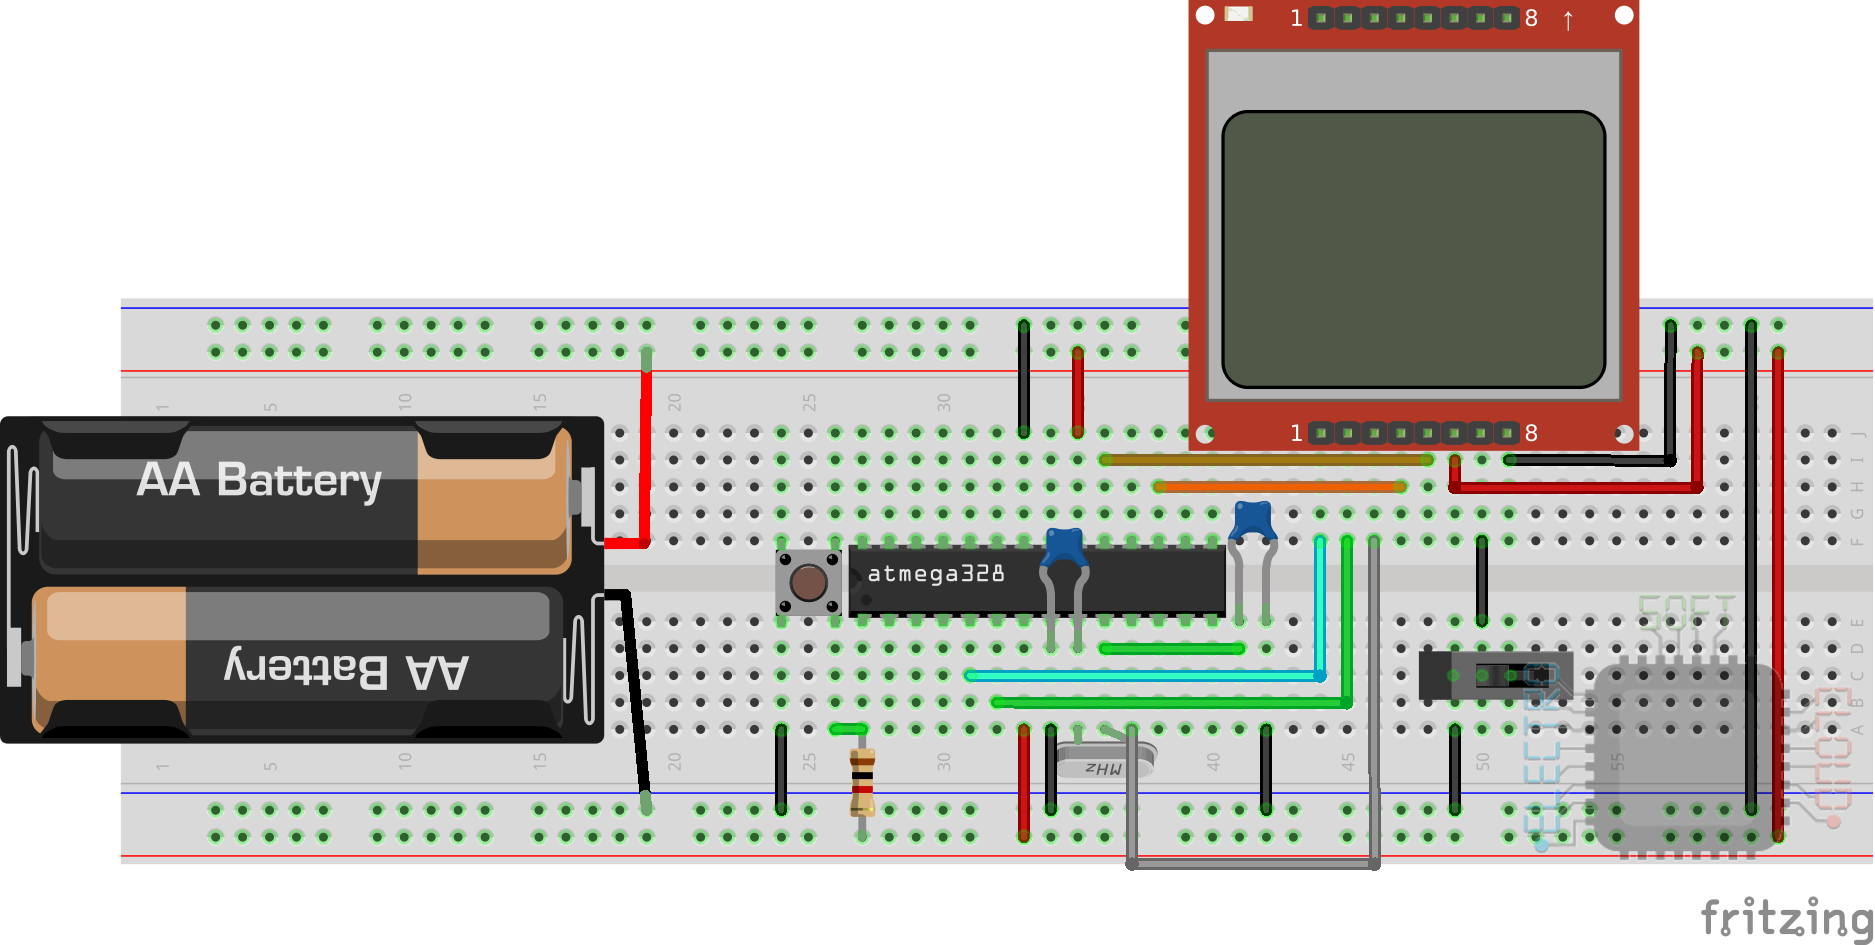
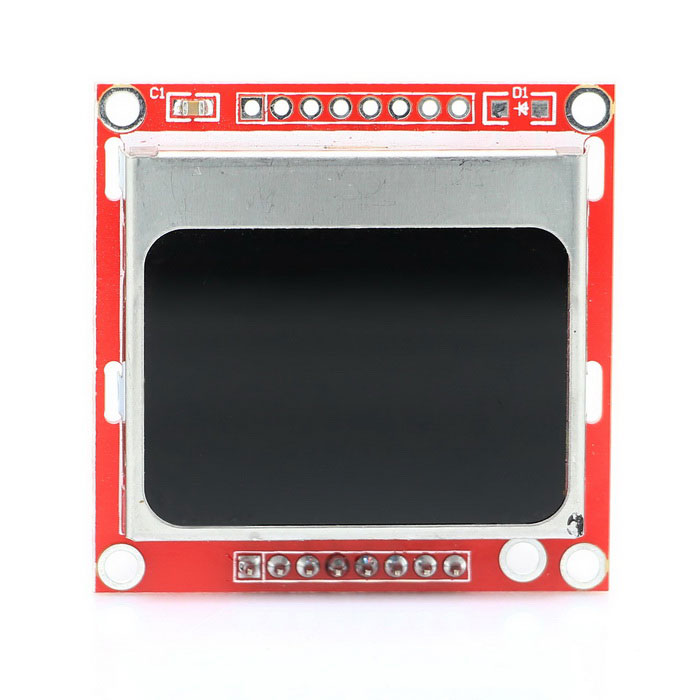
As said earlier Nokia 5110 Graphical LCD has 84 pixels in horizontal and 48 pixels in vertical. The total display size is 1.72' x 1.72'. The total display size is 1.72' x 1.72'. The module has 6 input pins using which we can interface it to any microcontroller through SPI communication.

Menu on Nokia 5110 LCD display with Arduino
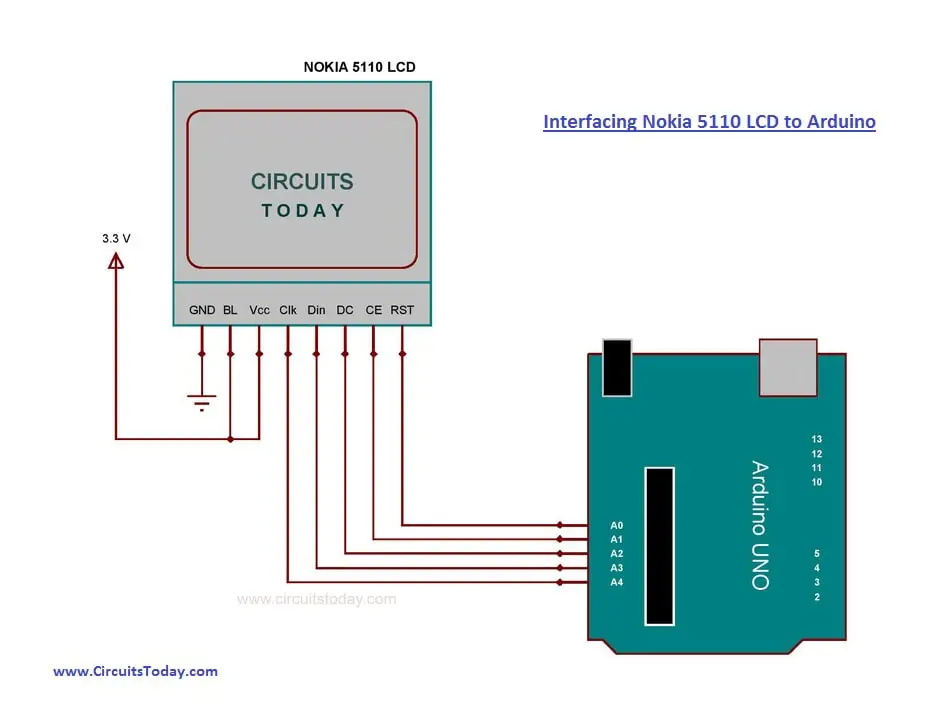
The Nokia 5110 LCD uses 3.3V so we need to make sure that we connect it too the 3.3v on the Arduino not 5V. A lot of tutorials out there say to not use the 5V logic voltage with these displays, as it may shorten the display's lifespan.
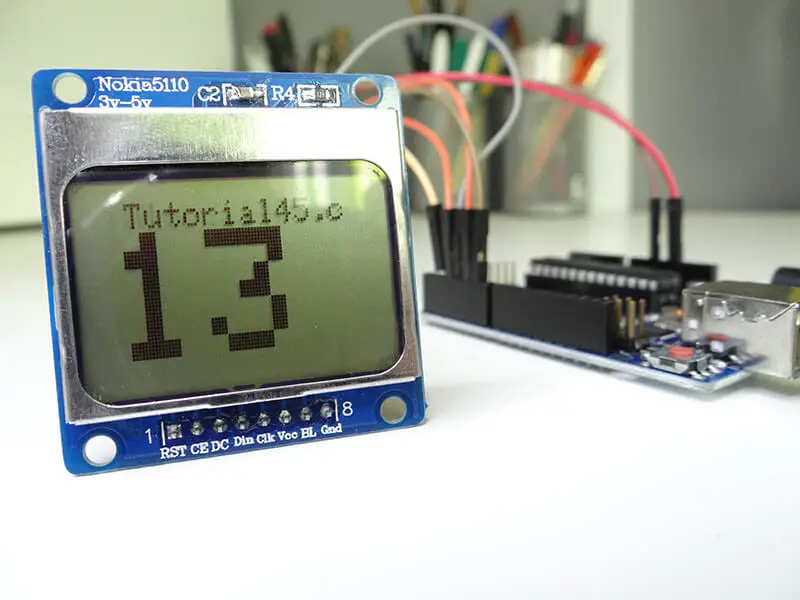
Arduino Count up Timer Using the Nokia 5110 LCD Tutorial45
The Nokia 5110 LCD display module has the following pinout: RST pin is used to reset the display. It is an active low pin, which means that by pulling it low, the display can be reset. By connecting this pin to the Arduino's reset, the screen will be automatically reset.
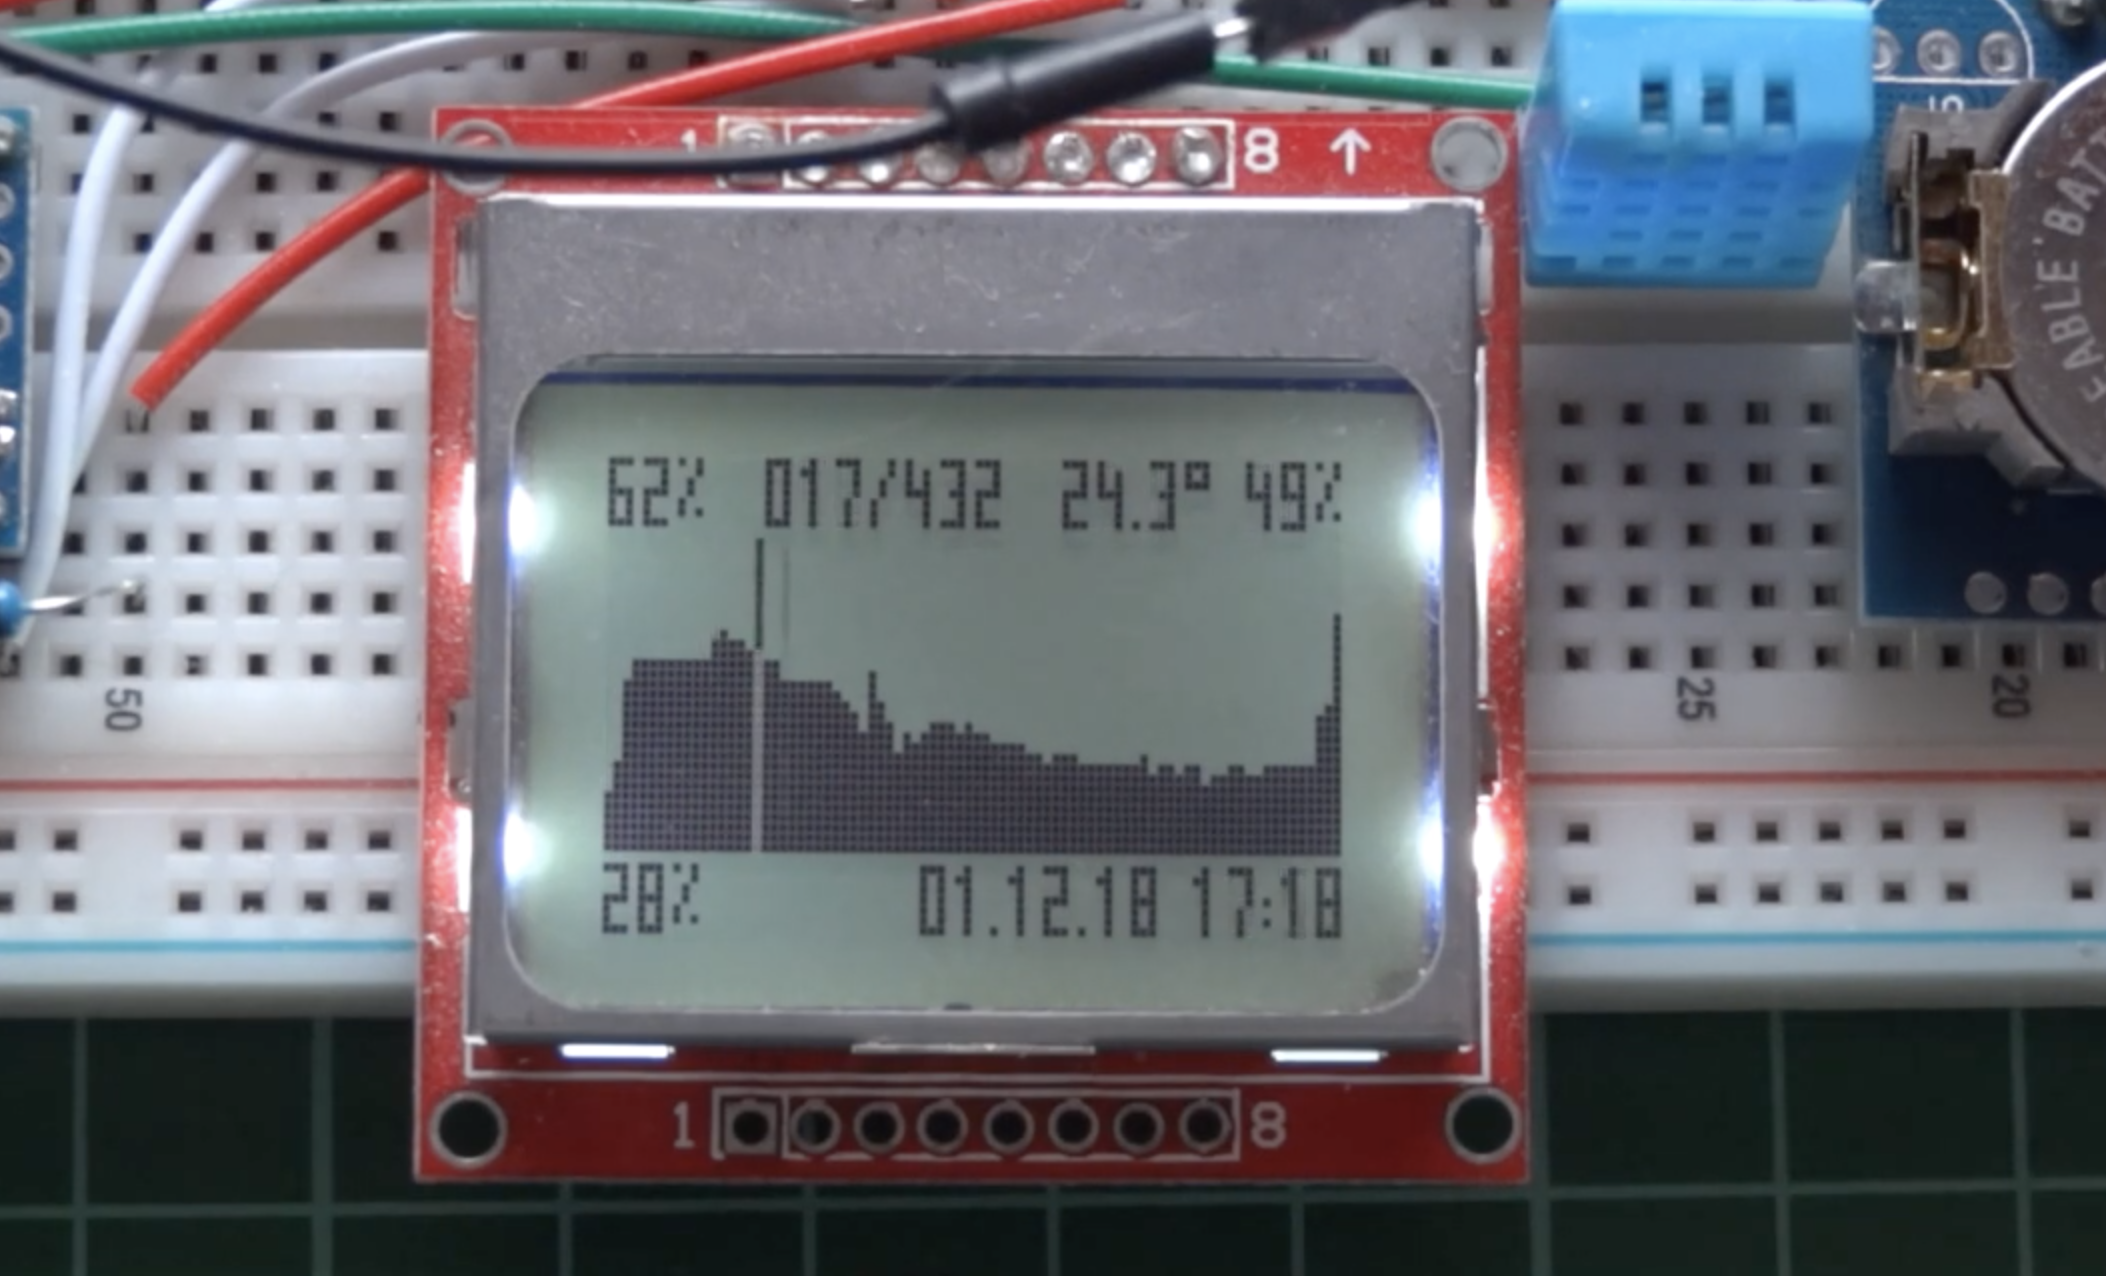
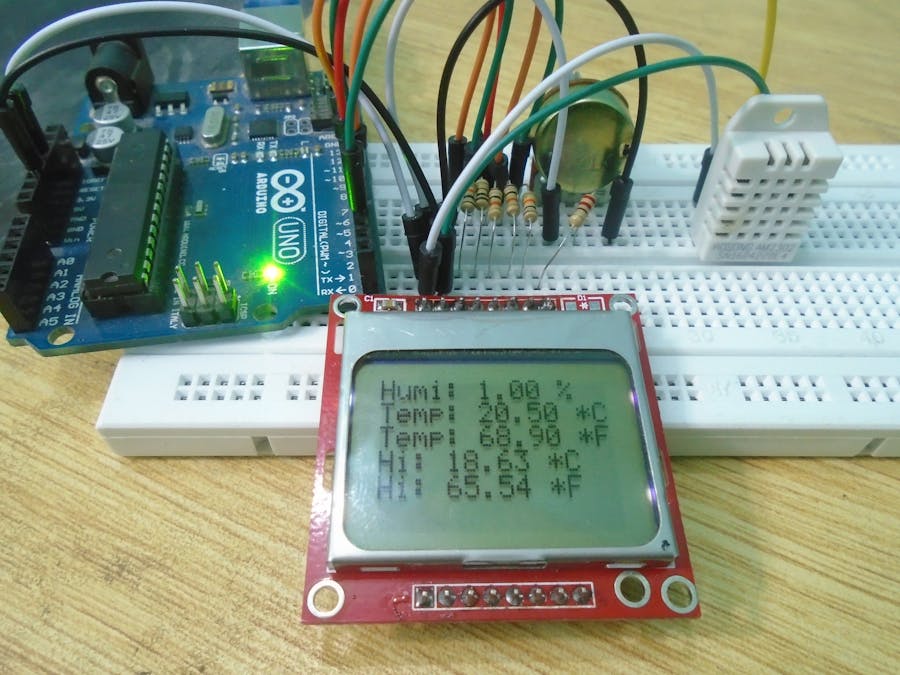
Nokia 5110 LCD based Arduino Datalogger with Menu
The Nokia 5110 LCD is a Monochrome Graphical LCD with a resolution of 84 x 48 Pixels i.e., it contains 48 Rows and 84 Columns. You can control individual pixel on the screen and hence, this LCD Module is suitable for displaying text, graphics and bitmaps. Coming to the data transfer, a serial interface is used to communicate with the LCD Module.
Nokia 5110 LCD Arduino Ultimate Tutorial
Arduino, DIY Projects Interfacing Nokia 5110 LCD with Arduino | Hookup Guide January 5, 2021 By Ravi Teja In this project, I will show you how to interface a Nokia 5110 LCD with Arduino UNO. First, we will see a little bit about the famous Nokia 5110 LCD Module and its LCD Controller PCD8544 from Phillips.

[Arduino範例] Nokia 5110 LCD與u8g2函式庫
The LCD 5110 display module uses SPI (Serial Peripheral Interface) communication protocol, the name of each connection pin is marked on the back of the LCD module as show below. * Connect to D7 via a 330 ohm resistor. How to interface LCD 5110 with Arduino I uses an Arduino Nano to interface with LCD 5110 module.
Connecting Nokia 5110 LCD with Arduino [Guide] NerdyTechy
Specifications Nokia 5110 LCD 84*48 dot matrix LCD (shows 4 lines of characters) Price: $2/$3 Voltage: 3.3V Module size: 45.2mm x 43.1mm Model: Nokia 5510 Controller: PCD8544 Where to buy? You can purchase these modules from eBay for just a few dollars. Click here to see Nokia 5110 LCD for Arduino on eBay. Arduino with Nokia 5110 LCD
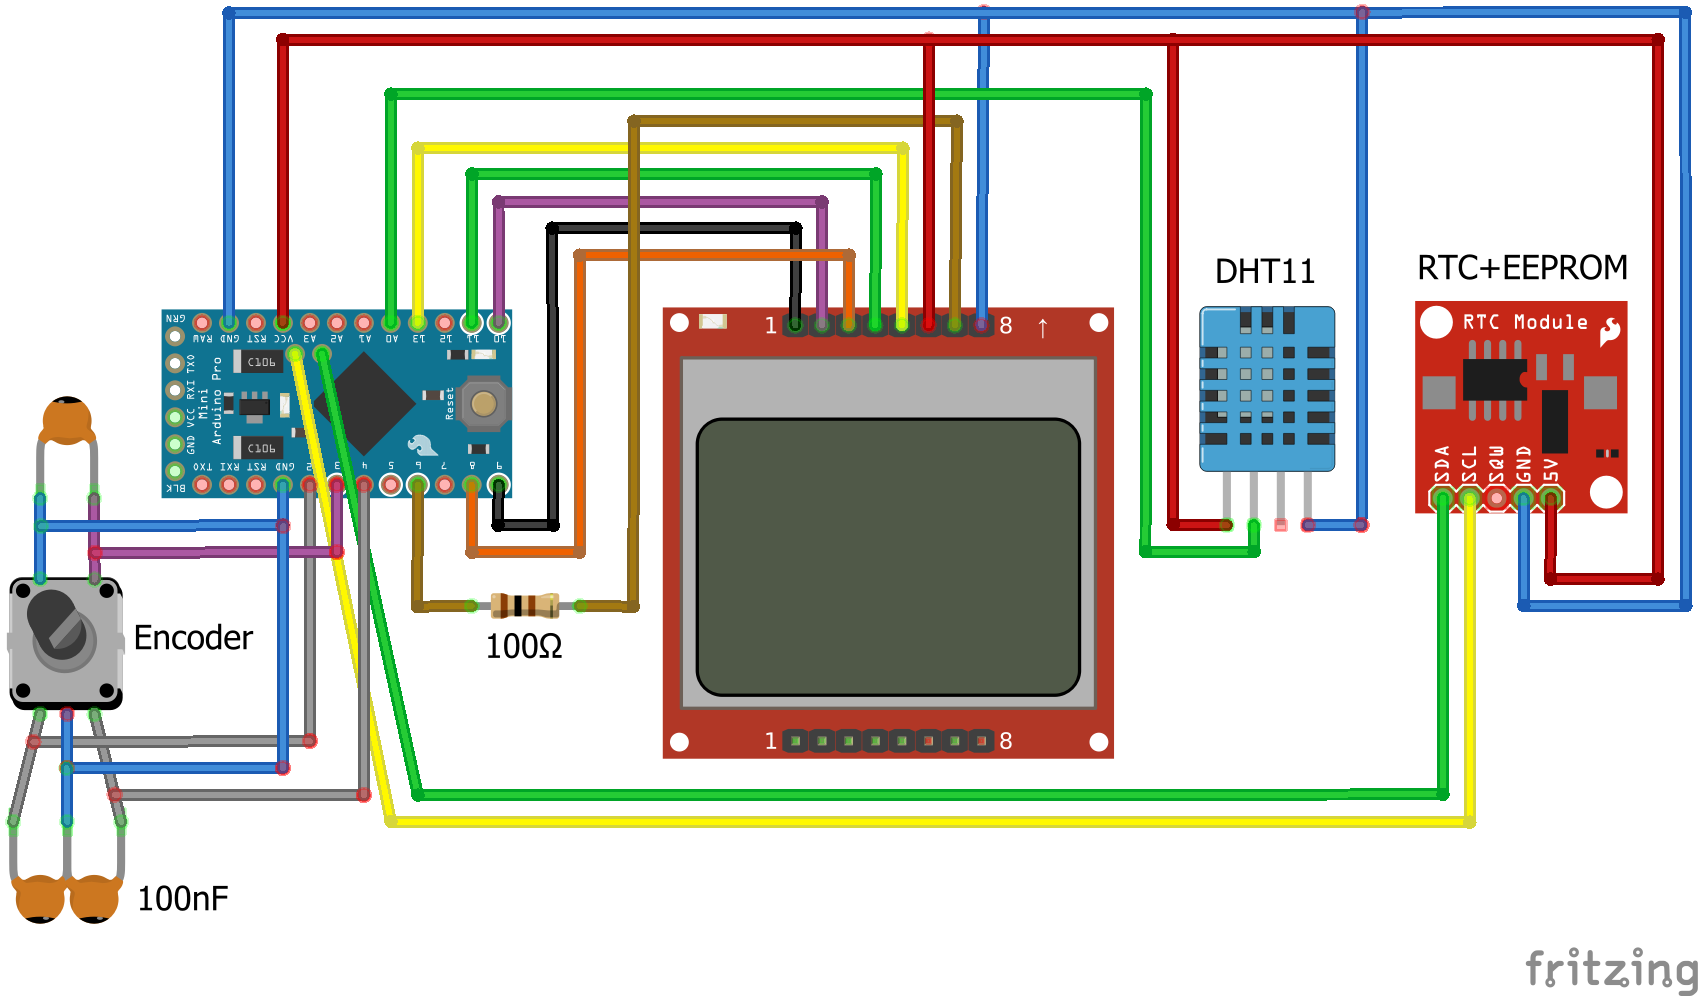
Nokia 5110 LCD based Arduino Datalogger with Menu ElectronicsLab
The Nokia 5110 is my favorite display for my Arduino Projects. The Nokia 5110 is a basic graphic LCD screen which was originally intended for as a cell phone screen. It uses the PCD8544 controller which is a low power CMOS LCD controller/driver. Because of this this display has an impressive power consumption.

Nokia 5110 LCD with Arduino Nano and u8glib
Since the LCD is 84×48, its important the canvass size is same as the screen, to ensure the designed graphics shows perfectly on the display. Specify Canvas Size. Graphics design with paint.net. In order to load our own graphics into the Arduino to be displayed by the Nokia 5110 display, we will need to use the LCD assistant software.
Interfacing Nokia 5110 LCD with Arduino Arduino Project Hub
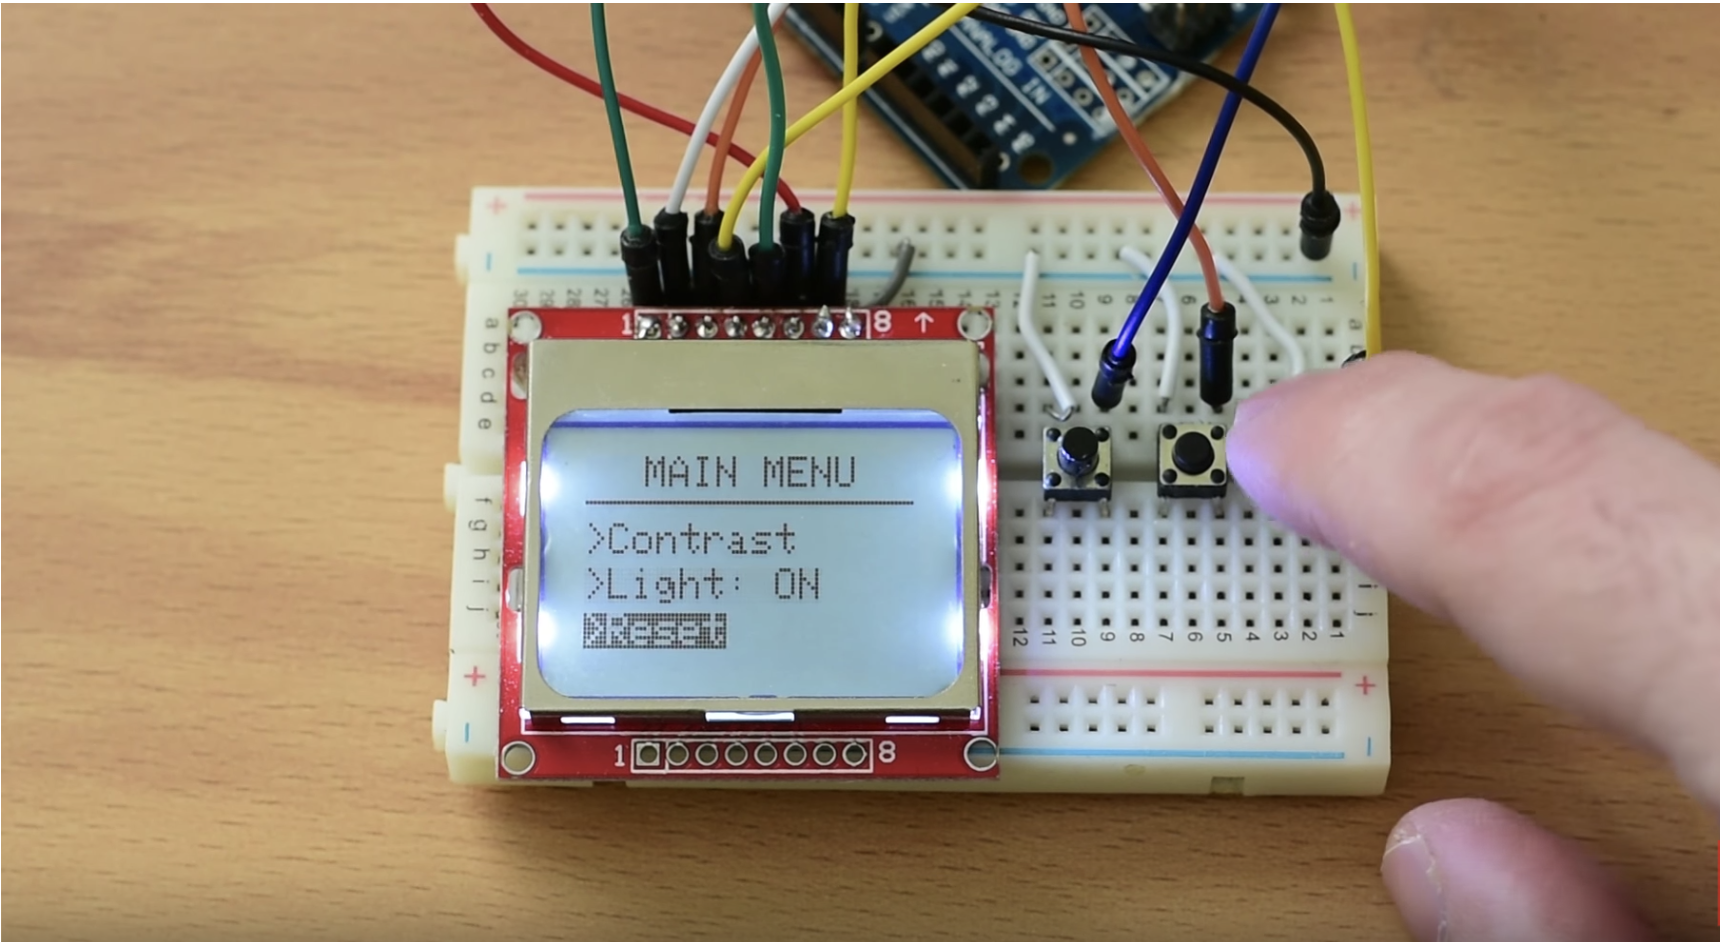
Nokia 5110 LCD Display. To showcase how to create the menu on a display with the Arduino, we will build a simple demo menu with three pages. To navigate through the menu, we will use 3x push buttons. The first to scroll up, the second to scroll down and the third one to select a highlighted option. The first screen/page of the menu will serve.

Arduino with NOKIA 5110 LCD and BMP280 sensor Simple Circuit
1. Nokia 5110 84×84 LCD 2. Arduino Mega 3. Jumpers 4. Breadboard 5. Power bank The Nokia 5110 display is basically a graphic LCD display useful for a lot of applications. It was intended originally to be used as a screen for cell phones and was used in lots of mobile phones during the 90's.
How to drive Nokia 5110 84x48 LCD display with Arduino Electronics
In this article, we will learn to interface a compact and monochrome LCD display named Nokia 5110 with Arduino Nano. This article will also demonstrate how we can display alphanumeric characters, draw lines and other shapes and even display bitmap images after converting them into a data array via "Nokia 5110".

Interfacing Nokia 5110 LCD with Arduino Nokia 5110 Arduino Tutorial
Let's see how to connect and use Nokia a 5110 LCD module with an Arduino UNO and display some text and graphic.Check out our tutorials page at : https://brai.

Connecting Nokia 5110 LCD with Arduino [Guide] NerdyTechy
1. Arduino UNO (With USB cable) 2. Nokia 5110 LCD (With tiny cables) Ask Question Step 1: The Connections Follow the connections as shown in the picture. You may use tiny cables to make connections are working. Ask Question Step 2: The Codes There are some files below. text.txt file has got whole codes for Arduino IDE

Complete Guide for Nokia 5110 LCD with Arduino Random Nerd Tutorials
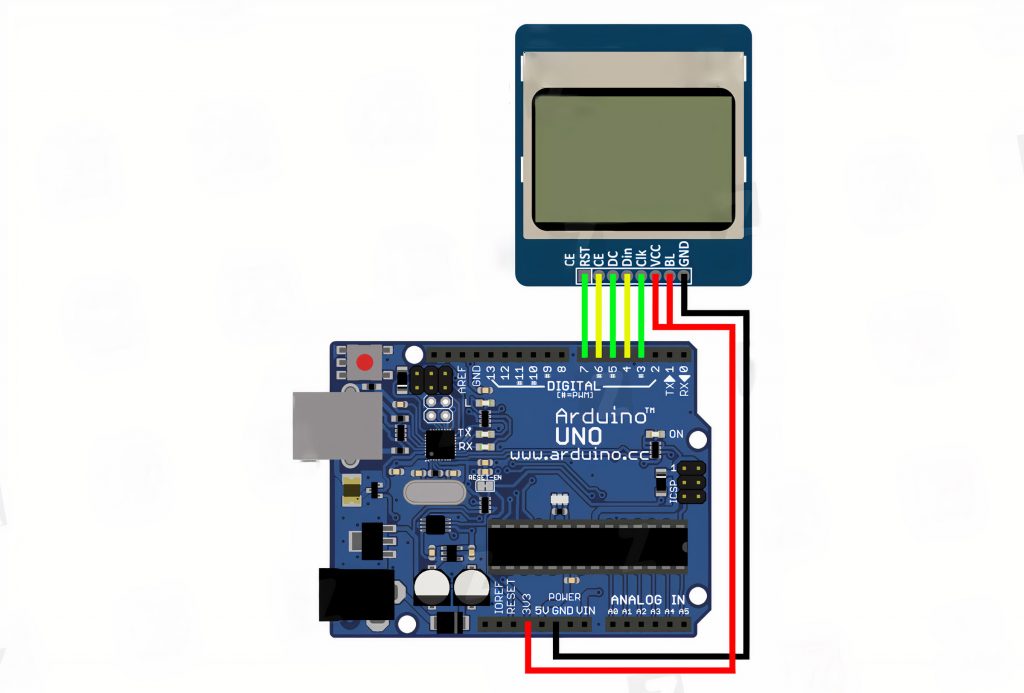
Connecting the 5110 Display to the Arduino To begin with, let's look at connecting this display to the Arduino and look at the data interface. The display board has 8 pins: RST - Reset; CE - Chip Select (device selection); DC - Data/Command select (mode selection); DIn - Data In (data); Clk - Clock (clocking signal); Vcc - 3.3V power supply;